cPanel lets you filter email sent to a specific user’s address. This can be useful for discarding spam, redirecting mail, or piping messages to a program.
Add a User Level Filter
It is important to give the filter an appropriate name, as it will make the task of managing existing filters easier in the future.
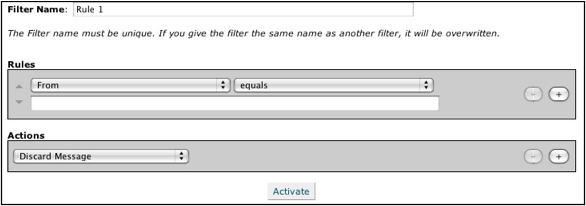
The Edit Filter screen.
To create a new filter:
- Click Create a new Filter.
- Type a name for the filter in the Filter Name box.
- Select a message characteristic from the first pull-down menu.
- Select an operator from the next pull-down menu.
- Enter the characters or words you wish to use as a filter.
- You can add and subtract rules by clicking the + and - buttons.
- Select an action from the pull-down menu under the Actions heading. You can add and subtract actions by clicking the + and - buttons.
- Click Activate to initialize the filter.
For a comprehensive list of options available to configure your filter, click here.
 A word about operators: When you create a filter using several operators, it may be useful to note that cPanel will always process the "and" operator before the "or" operator. As a result, email filters will be processed as follows:
- A or B and C will be processed as A or (B and C).
- A and B or C will be processed as (A and B) or C.
If you wish to create a filter such as (A or B) and (C or D), you would have to create it like so:
- (A and C) or (A and D) or (B and C) or (B and D).
Test a Custom Filter
Once a filter has been created, it can be tested.
To test your filter:
- Type a test email message in the text box below the Filter Test heading.
- Be sure to include the characters or words that you have set your filter to catch.
- Click Test Filter. When the test is run, the next screen should display a similar result to the screenshot below.
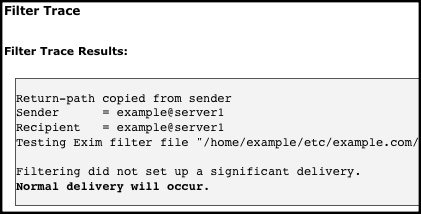
Filter Test Results.
This screen summarizes the actions taken by the filter. It is important to read over the data to ensure that the filter produces the desired result.
Edit a Custom Filter
You can also modify an existing filter.
To edit an existing filter:
- Click Edit next to the appropriate filter name.
- You can adjust any of the fields displayed — the message characteristic, operator, term to filter, or resulting action.
- Click Activate to initialize the filter.
Remove an Existing Filter
To delete a filter:
- Click Delete.
- Confirm that the filter should be deleted on the following page.
