Doteasy Tutorials - FTP
FTP a software that is commonly used to transfer files from one computer to another. In this case you will be transferring files from your computer to the Doteasy web server. This tutorial explains to you how to use Filezilla software on Windows to upload files to your server. To follow this tutorial you will need to have your Doteasy Member ID and password, a copy of Filezilla installed on your computer and an internet connection.
I. Doteasy Basic Hosting FTP Tutorial.
 Start Filezilla software.
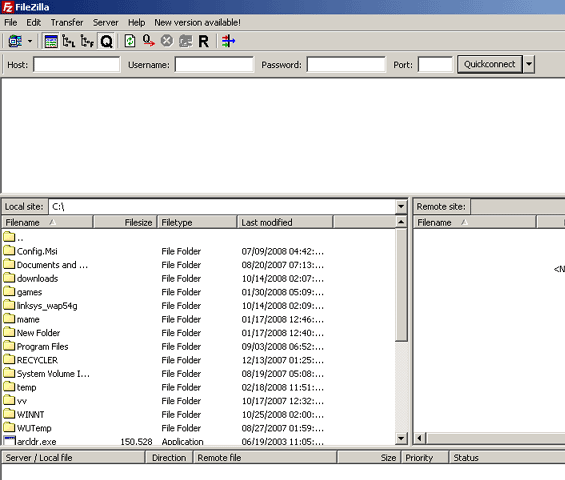
 Input the connection details as follows:
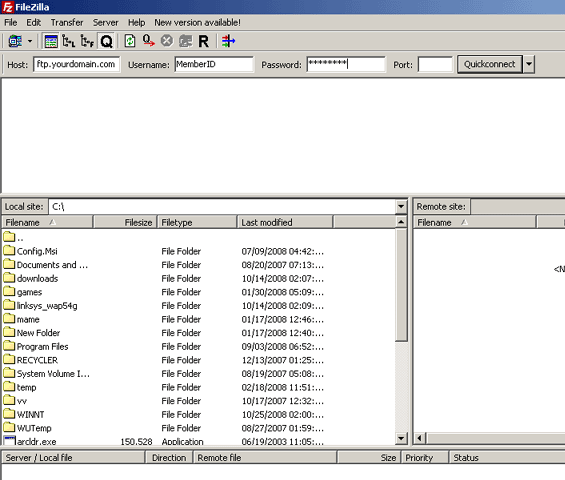

| Host: |
ftp.yourdomain.com
(substitute yourdomain.com with your domain name) |
| Username: |
Enter your Doteasy Member ID
(member ID only NOT administrative email address) |
| Password: |
Enter your Doteasy Member password
(passwords and IDs are case sensitive) |
Click Quickconnect.
 Once connected, your Local Site (your computer) will be shown on the left and the Remote Site (Doteasy Server) will be shown on the right.
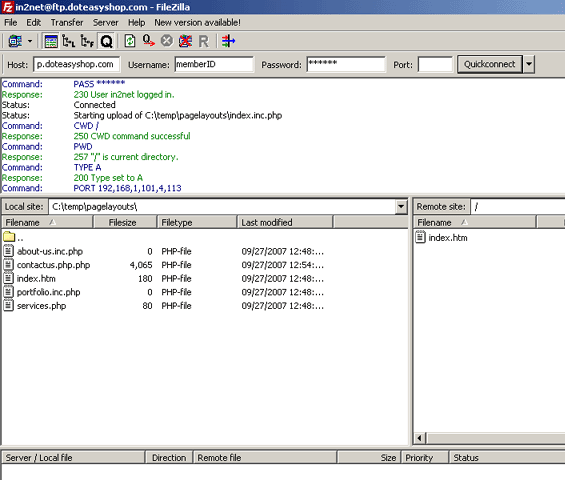
 To upload files, select the file(s) or folders you wish to transfer on the Local Site and drag and drop them to the Remote Site. You may select multiple files to transfer by holding down your Ctrl key while you select files. You should overwrite the files on the remote system if you are making changes to your website.
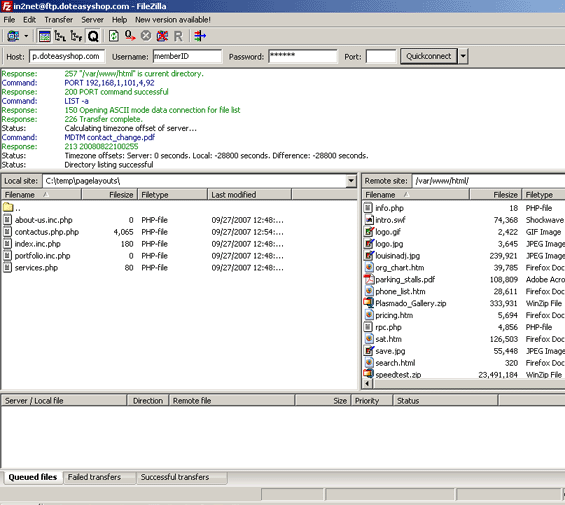

 The uploaded file will appear on the server. After you have finished uploading all of the necessary files, you may exit the program and view your changes through a web browser.
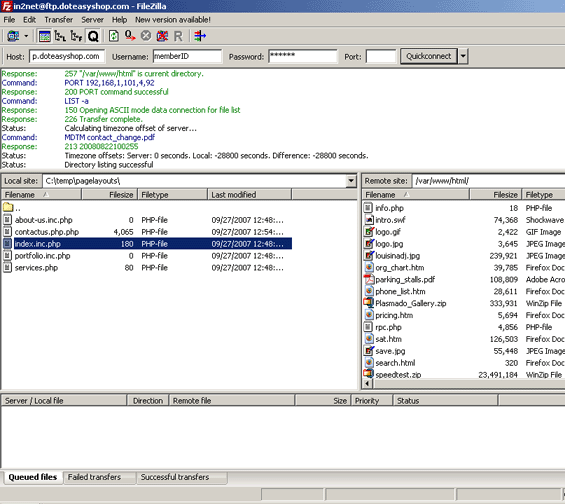
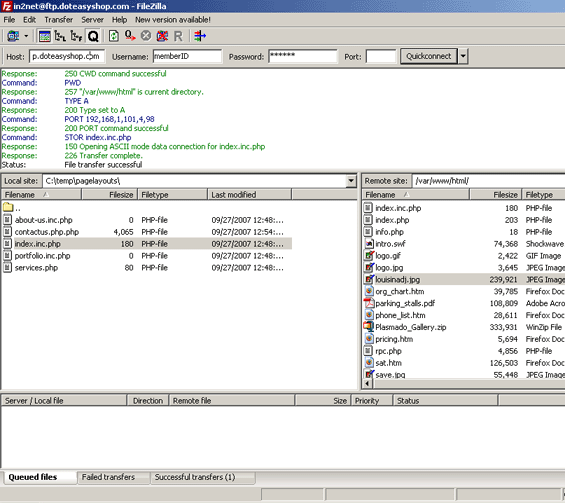
Your web pages, files and sub-folders should be placed inside the / (root) directory on the remote system. You can create sub-folders by clicking Create New Folder button to the right of your system menu. Your website initial page should be named index.html to display correct. All filenames and directories are case-sensitive.
* If changes are not visible after you have uploaded new content to your website, please try clearing your browser cache or temporary internet files and refresh the page.
II. Unlimited Hosting FTP Tutorial.
 Start Filezilla software.

 Input the connection details as follows:

| Host: |
ftp.yourdomain.com
(substitute yourdomain.com with your domain name) |
| Username: |
Enter your Doteasy Member ID
(member ID only NOT administrative email address) |
| Password: |
Enter your Doteasy Member password
(passwords and IDs are case sensitive) |
Click Quickconnect.
 Once connected, your Local Site (your computer) will be shown on the left and the Remote Site (Doteasy Server) will be shown on the right.
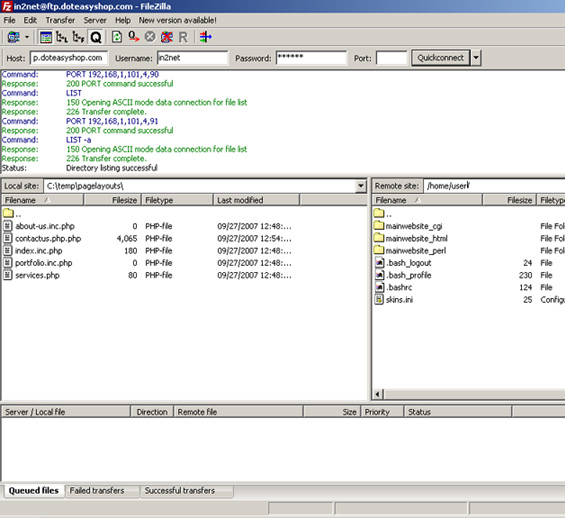
 Double-click on the /Mainwebsite_HTML shortcut link to get to your root web location. This shortcut link will bring you to /var/www/html/ location which is your website publishing location.


 To upload files, select the file(s) or folders you wish to transfer on the Local Site and drag and drop them to the Remote Site. You may select multiple files to transfer by holding down your Ctrl key while you select files. You should overwrite the files on the remote system if you are making changes to your website.

 The uploaded file will appear on the server. After you have finished uploading all of the necessary files, you may exit the program and view your changes through a web browser.

Your web pages, files and sub-folders should be placed inside the / (root) directory on the remote system. You can create sub-folders by clicking Create New Folder button to the right of your system menu. Your website initial page should be named index.html to display correct. All filenames and directories are case-sensitive.
* If changes are not visible after you have uploaded new content to your website, please try clearing your browser cache or temporary internet files and refresh the page.
If you require additional assistance, please feel free to contact us: http://www.doteasy.com/support/


