Doteasy Tutorials - Email
Creating, modifying and deleting email accounts is handled from the Doteasy Webmail system. You can either sign in directly from our homepage as email administrator or you can follow the steps shown in this guide.
Other information shown in this guide include how to setup an email signature in Webmail and how to modify an email box storage size.
Creating Email Accounts
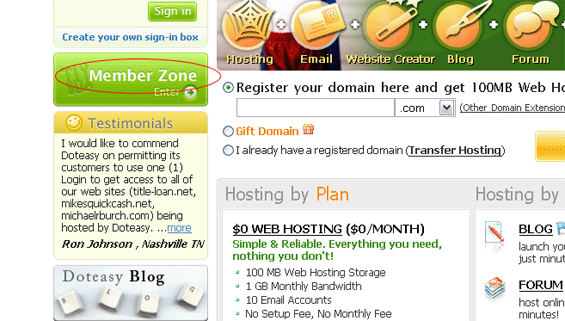
 Click on Member Zone
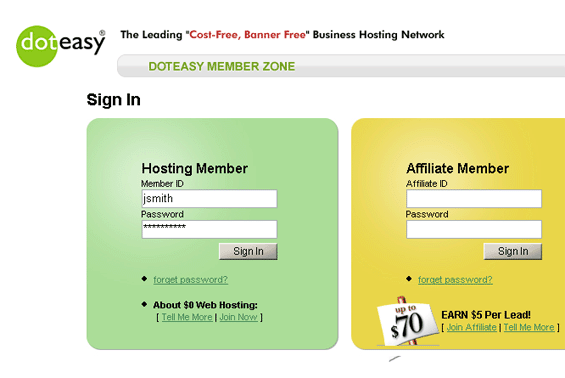
 Login to Member Zone
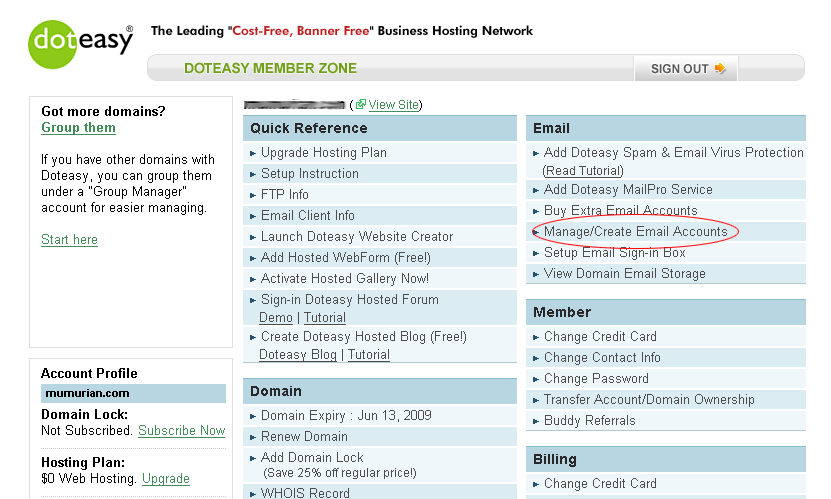
 Click on Manage/Create Email Accounts
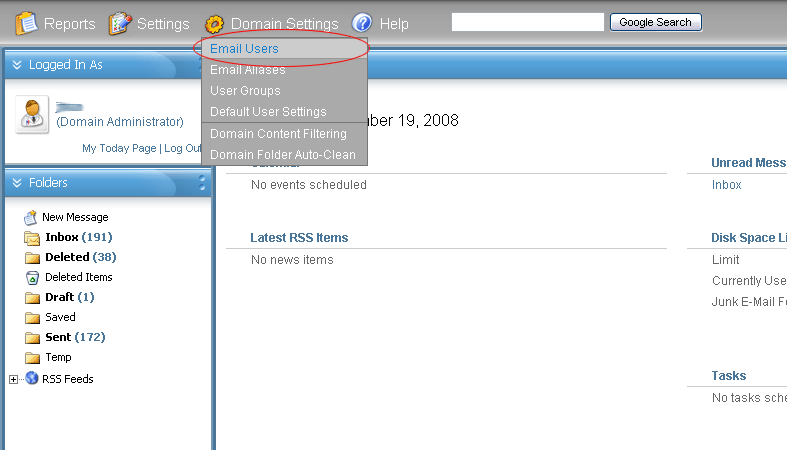
 Click on Email Users under the Domain Settings tab
 Click on Add User

 Specify new email user information and click Save

Email account creation is complete. Email can be sent and received using the Doteasy Webmail system or using POP email software. To find out how to configure your email software to retrieve email, please view the POP Email tutorial for your particular software.
Important: To use newly created email accounts in Webmail, you must logout of email administrator account and login using the user account information.
Top
Setting Up Email Signature
Login to the Webmail Account you wish to setup Email Signature for and click on My Settings under the Settings tab
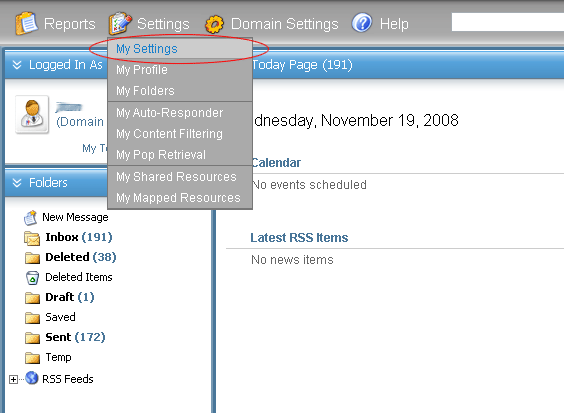
Click on the Compose tab
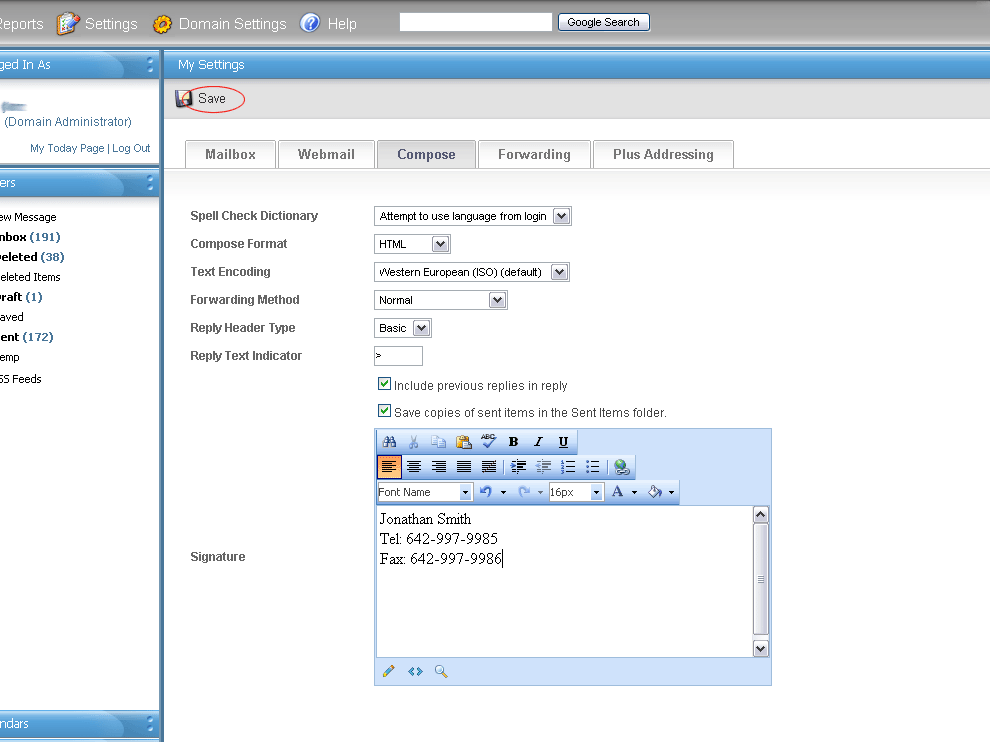
Enter your Email Signature information in the Signature box and click Save
Top
Changing Email Account Size
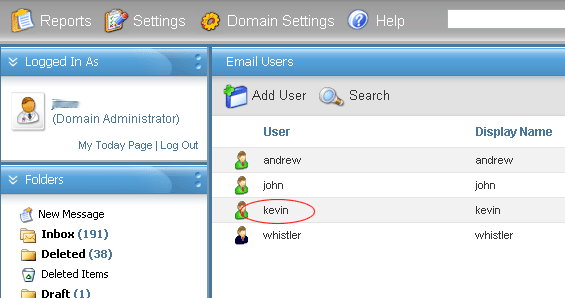
Login to Webmail as Email Administrator. Then click on Email Users under the Domain Settings tab
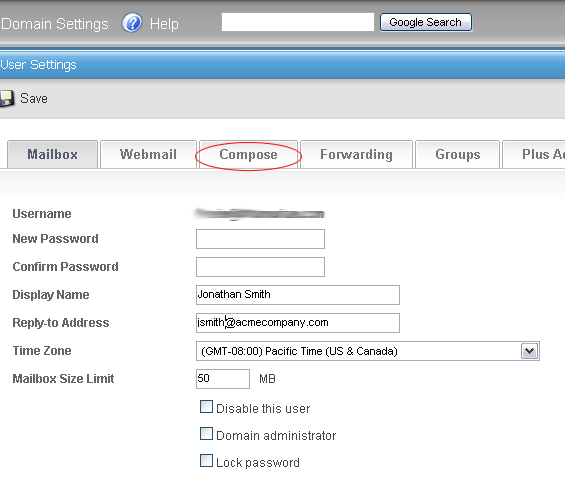
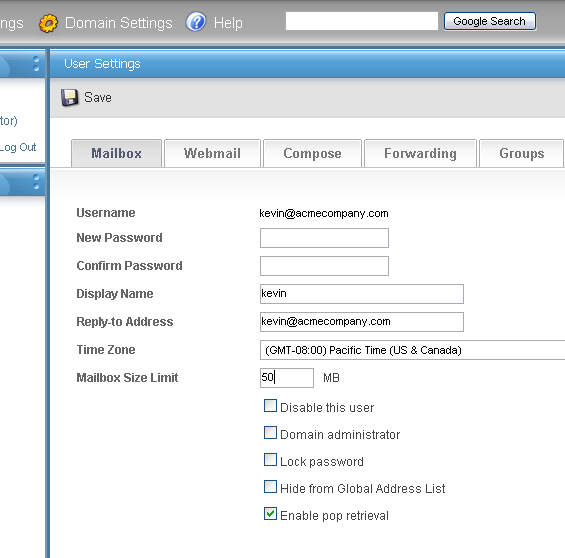
Click the name of the user you wish to modify
Modify the Mailbox Size Limit as necessary and click Save
Note that a limit value of 0 means infinite or no limit.
The total email storage space for a domain account is shared amongst all users. You can assign a larger Mailbox Size Limit to those that need it and a smaller Mailbox Size Limit to those that don't.
New incoming email will be rejected and bounced back to sender if total domain email storage limit is reached. Deleting emails to lower usage level or upgrading the account will restore email functionality.
If you require additional assistance, please feel free to contact our customer service team: http://www.doteasy.com/support/


