Doteasy Tutorials - DNS Changes
If your domain is registered with Go Daddy , this tutorial will guide you through the DNS change process to point your domain name to Doteasy servers.
Part I - DNS Modification
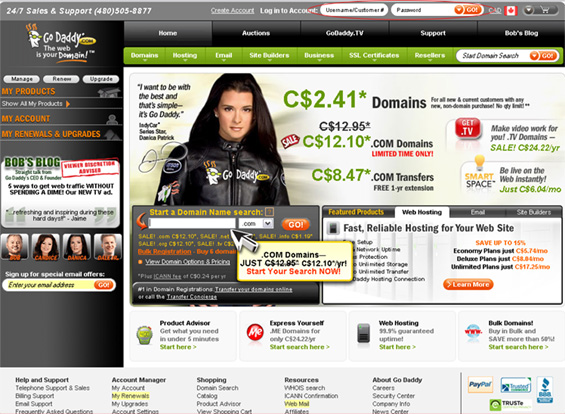
 Visit http://www.godaddy.com and enter your Customer Number and Password at the top of the GoDaddy homepage to login to your control panel.
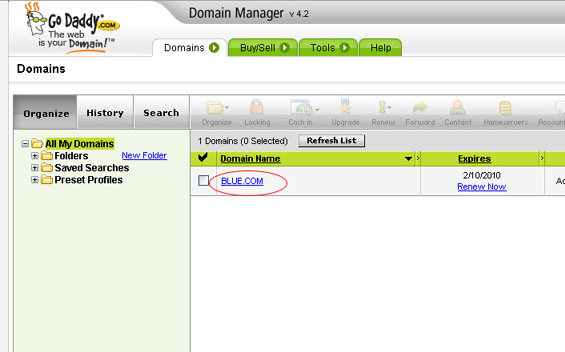
 Once you are logged in, please click Domain Manager on the left menu. You will see a list of your domain name(s).
 Click on the domain name you wish to manage.
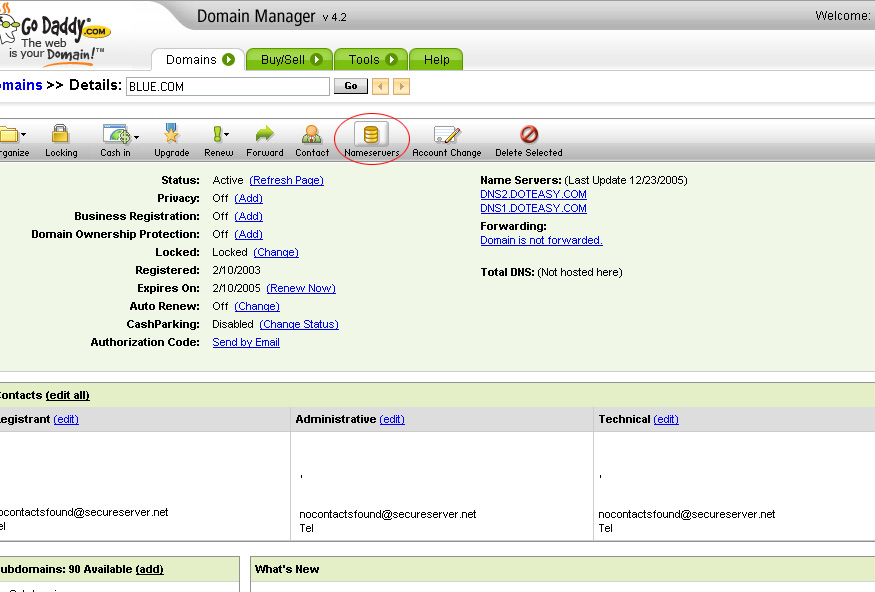
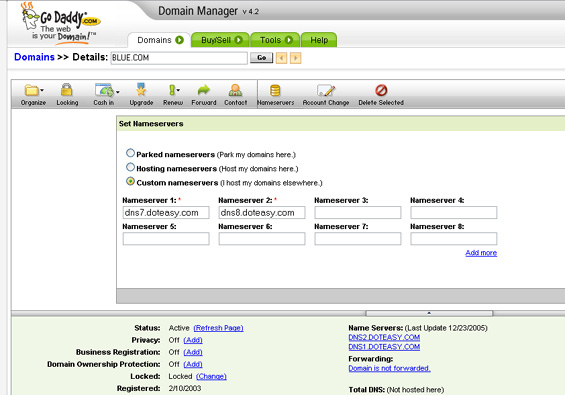
 Click on the Nameservers icon on the menu. This will open up the nameserver modification page.

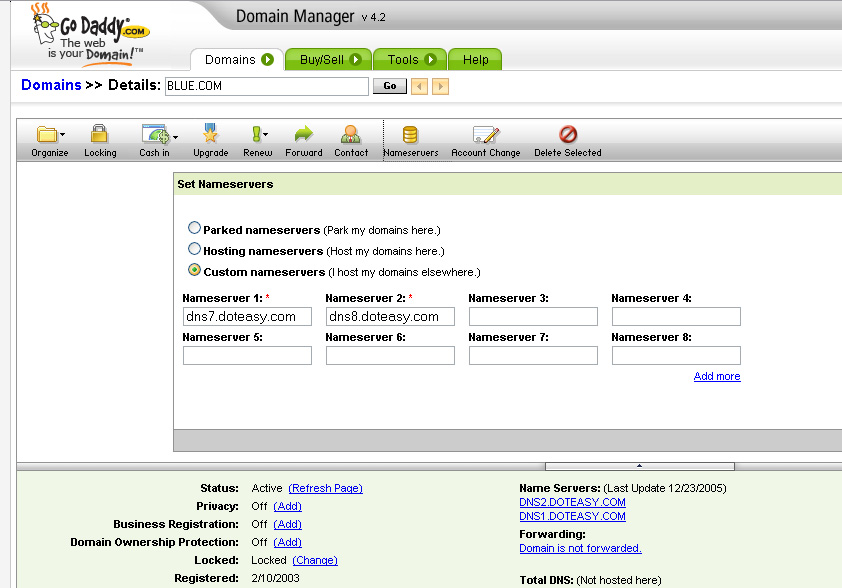
 Select Custom Nameservers (I host my domains elsewhere.) and input your assigned DNS servers as sent to you by email (EG dns7.doteasy.com and dns8.doteasy.com) as Nameserver 1 and Nameserver 2 and click OK.
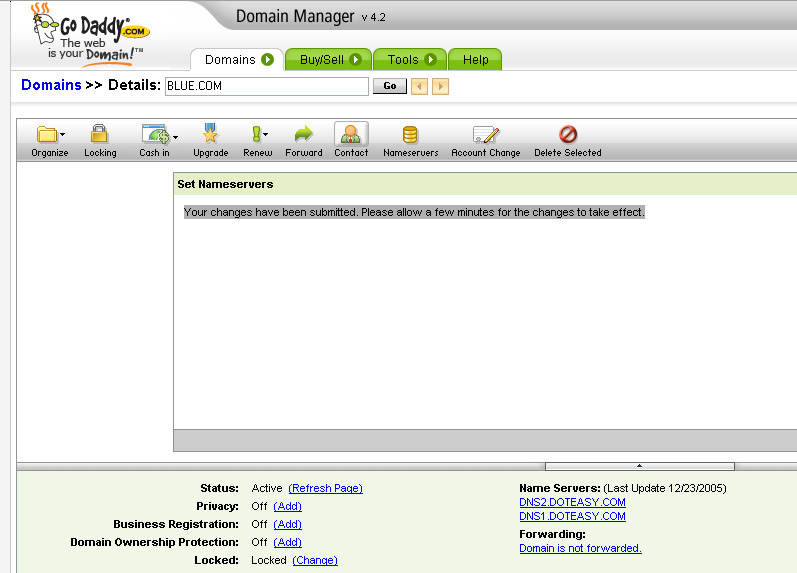
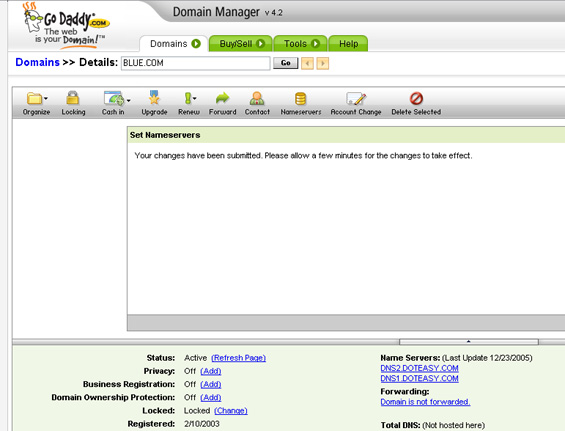
 You will see a confirmation that changes have been submitted. You should allow up to 24 hrs for changes to take effect. Once they do take effect, when you view your URL in your browser, you will see a Doteasy temporary website page.
Part II - Technical Contact Modification
Click on Domains and on the domain you wish to manage again.
Click the Contact icon in the menu and then click on the Technical tab. Enter the Doteasy Technical contact information as provided below and click OK.
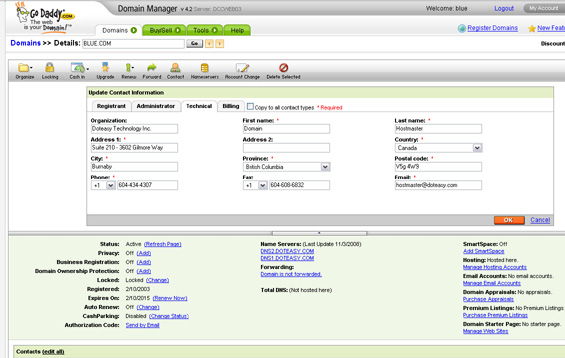
Domain Technical Info:
Contact Name: Domain Hostmaster
Organization: Doteasy Technology Inc.
Street Address: Suite 210 - 3602 Gilmore Way
City: Burnaby
Province/State: BC
Postal/Zip Code: V5G 4W9
Country: Canada
Phone Number: (604) 434-4307
Fax Number: (604) 608-6832
Email: hostmaster@doteasy.com
You have successfully completed your domain DNS and technical contact change. You should allow up to 24 hrs for changes to take effect. Once they do take effect, when you view your URL in your browser, you will see a Doteasy temporary website page.
If you require additional assistance, please feel free to contact our customer service team: http://www.doteasy.com/support/